Tuesday, November 20, 2018

Creative Inking Blog Hop…Holiday Gift Giving!


Hello Stampers!
Welcome to the Creative Inking Blog Hop!   This month we are highlighting Holiday Gift Giving.  And for my post, I have decided to go one step further and make my gift perfect for New Years Celebrations!

IMG_2558
Using the Broadway Bound Designer Series Paper….take a 3’’ x 9” piece and wrap it around your mini Champagne bottle adhering using Tear and Tape.  I thoughts the gold, silver and black dots are perfect for a little bottle of bubbly!! Tied off with our Black Glittered Ribbon….its not just for Halloween!!  Tuck a couple of sparklers in the bow!!
IMG_2560
Add the New Years sentiment from the Warm Hearted Hostess Set…the Layering Oval framelits are perfect for any sentiment in that set!  Accent with some snowflakes from the Blizzard Thinelts…because we not not over winter snows just yet!  (or in Wisconsin not for a loooong time!!)
IMG_2555
Add some decorative mini snowflakes to the sparkler tips….and a couple of Rhinestone Gems to make it shine!
IMG_2558
What a lovely little gift to give to  special friends or family members….they will be thinking of you at Midnight on New Years Eve when they crack it open and light the sparklers into the New Year!!
Now it is time to check out all the other wonderful creations!!
Click here to to continue onto Barb’s Blog….

Hop this way to the next blog
or hop back to see what Diane has to share!!
Or this way to the prior blog
And finally….If there is any thing that you would like ….just click on the pictures below and it will take you right to my store.  And as always thank you for your orders….I truly appreciate it!!

until next time…..
ReneeKohnkeSignature


Sunday, November 18, 2018

Dashing Deer

Back with one of my favorite stamp sets….  Dashing Deer .  Here is a beautiful , yet simple Z – Fold Card.  
IMG_2571
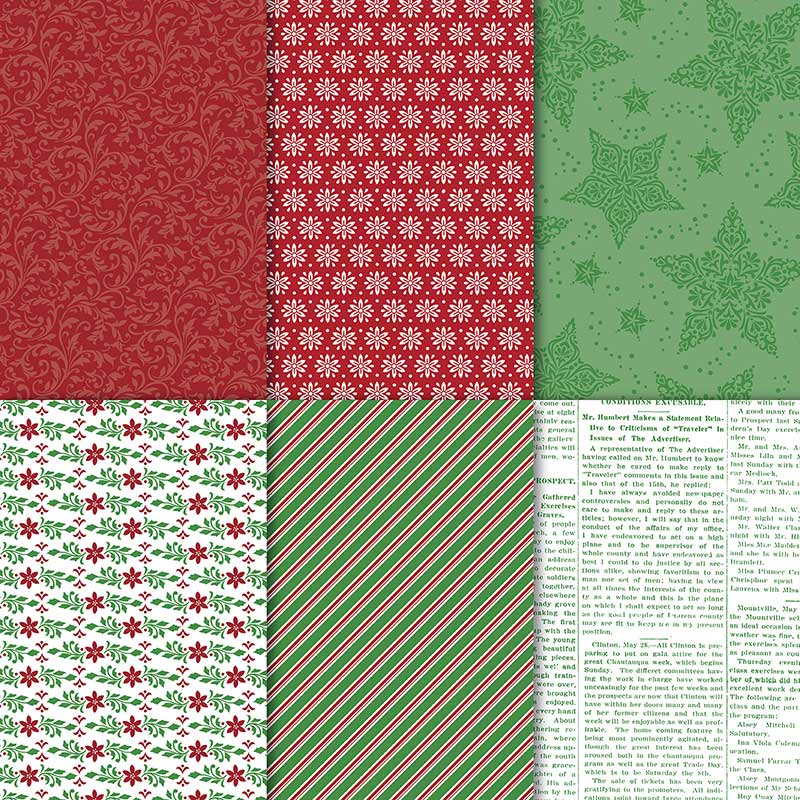
Using the newly available Dashing Along Designer Series Paper ….along with Cherry Cobbler Cardstock makes for a stunning backdrop for this card!
Dashing Along Designer Series Paper
149903
Price: $11.00

IMG_2575
Add the Gold Foil Deer cut from the framelits ….tie a Real Red Mixed Satin Ribbon around his neck.  And a Red Rhinestone for his nose.

IMG_E2584
Add the sentiment from the Stamp Set …Dashing Deer and you have a elegant  card!
IMG_E2581
If there is anything you would like to order please click on the pictures below …it will take you right to my store.  And as always…thank you for your orders!!


until next time…..
ReneeKohnkeSignature


Friday, October 26, 2018

More from Holiday Stamp Camp!

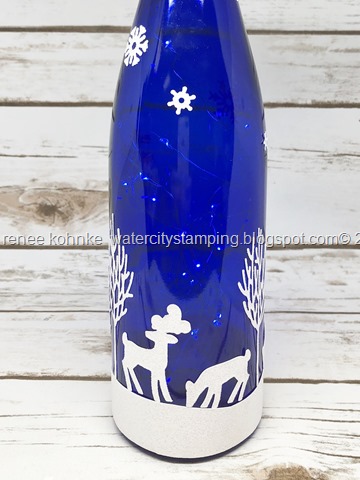
At my Annual Holiday Stamp Camp we make five  3-D projects that are perfect for gift giving or keeping for yourself.   One of the favorites was this decorated wine bottle.
IMG_1905
Isn't this adorable??   I have wanted to do a wine bottle project for a long time…but never wanted to drill a hole in the bottle to add lights….until one of my Team Members…Sue Gosz showed me these awesome cork lights from Amazon!!! 
Glass Bottle Insert LED Glimmer Strings Silver
So easy!!!!  I was sold!
So onto the bottle!!  And as far as the bottles…..no I did not drink 35 bottles of Riesling Wine…although it may have been fun….I did get the bottles from a craft brewery online!!
Case of 12 - 750 ML Cobalt Blue Hock Bottles

Next…..You will need our Stampin’ Up! Multi Purpose Adhesive Sheets and our Stampin’ Up Sparlke Glimmer Paper.

Multipurpose Adhesive Sheets         
MULTIPURPOSE ADHESIVE SHEETS
Price: $10.00   
Sparkle Glimmer Paper
SPARKLE GLIMMER PAPER
Price: $5.00
After I adhered the adhesive sheets to the back of the sparkle paper…I cut the sheets to 4 inches wide and everyone just needed one 4 x 12 inch piece.  And here are the directions…..

1.  Cut the bottom of the sheet to make a curvy snow hill….no wider than 2 inches.  Adhere to the bottle.
USING YOUR BIGSHOT…..ALWAYS CUT THE GLIMMER PAPER WITH ADHESIVE SHEETS FROM THE BACK SIDE….DO NOT CUT FROM THE FRONT OF THE GLIMMER PAPER ORYOU WILL HAVE A STICKY MESS!
2.  With the rest of the Sparkle paper……cut 3 trees from Winter Woods Framelits.
3.  Cut the 2 deer from the Dashing Deer Framelits.
4.  And using the rest of the Sparkle Paper cut as many snowflakes that you want with the Blizzard Framelits.  
5. Peel off the backing and adhere!!   Super easy and quick.
IMG_1910

IMG_1912

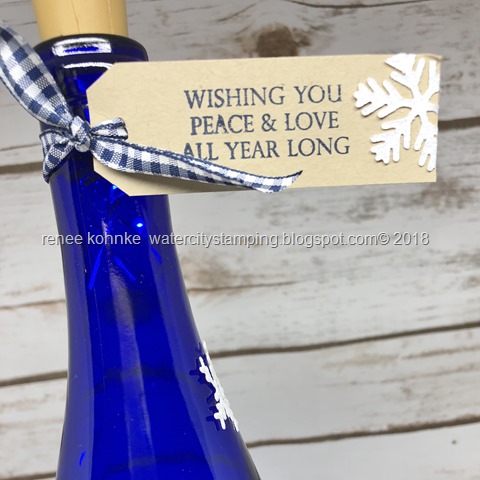
6.  Add a tag with our Night of Navy Gingham Ribbon.   Sentiment is from Merry Christmas to All. 
IMG_1906

7.  Add the cork lights and enjoy or give as a gift and make someone happy!!   The pictures don’t do it justice!!

IMG_1913
Hope you enjoy it!!  Check back tomorrow for another great project!!

If there is anything you would like to order please click on the pictures below …it will take you right to my store.  And as always…thank you for your orders!!


Until next time…..

ReneeKohnkeSignature


Sunday, October 21, 2018

Harvest Blessings Snack Mix Recipe

Yesterday I posted the adorable turkey treat bag filled with a crowd favorite snack mix called Harvest Blessings.   I make this every year for my Holiday Stamp Camp, our annual Autumn Sister’s Get Away weekend and for a delicious snack at Thanksgiving!!   Everyone loves it….and it is SUPER EASY to make!   Everyone always asks for the recipe and here it is!

IMG_E1982


1. First I start with my big blue roaster and fill it full of Chex cereal ,  a bag of Bugles, and  a bag Pretzels.   I don’t measure….whatever you have or whatever you prefer!!!   Just fill it full!

IMG_1996


2.  Melt 2 sticks of butter ( 1 Cup)  in a sauce pan.  Add 3/4 of a cup of brown sugar and a 1tsp of vanilla. 

3.  Bring to a boil and continue to boil lightly for 1 minute …making sure everything is fully dissolved. 

4.  Pour mixture over all ingredients in the roaster.  Stir and coat all ingredients.

5.  Bake at 250 for 45 minutes….stirring every 15 minutes.   Take out of the oven and let cool thoroughly.  

6.  After it has cooled completely….add 1 cup of Reese’s Pieces (or more), 1 cup of candy corn(or more), and 1 cup of candy pumpkins(or more) . (The good stuff! Wink! Wink!!)


This Halloween harvest hash Chex mix is the PERFECT combination of sweet and salty. It tastes soooo good!! It would be awesome for a Halloween party or even Thanksgiving!

7.  Mix….enjoy and share!!!  Mmmm Yummy!


until next time……

ReneeKohnkeSignature

Saturday, October 20, 2018

Creative Inking Blog Hop – With Gratitude

Hello Stampers!
Welcome to the Creative Inking Blog Hop!   This month we are highlighting Gratitude….
And here is my thoughts of Gratitude…perfect for Thanksgiving greetings and gifts.  An adorable card, along with a bag of yummy treats!!
IMG_E1966

Isn’t this turkey AWESOME!!  Here was made from the Stamp Set …Making Everyday Bright …punched out with the Light Bulb Punch.   Using Cherry Cobbler, Pumpkin Pie, and Crushed Curry for the feathers.  The lovely background DSP comes from Country Lane Designer Paper.   And the sentiment is from the same suite….coming from the Country Home Stamp Set.


His body is punched from Pretty Label Punch in early Espresso.  Feet are from the Fox Builder Punch.   And his head is from the Light Bulb punch in Soft Suede.
Add a triangle for his month, a bit of cherry cobbler for the waddle and you are all set.

IMG_E1965
Finish the inside with feelings of gratitude and thanks…..again from the Country Home Stamp Set.
IMG_E1982
Now how about a treat to match…..same darling turkey….attached to a bag of homemade Harvest Blessing Snack Mix.   Always a autumn favorite!!!  Mmmm Yummy!!   I will post the recipe on my blog on Sunday!!  Check back for this delicious treat.  Always a crowd favorite!!

Now it is time to check out all the other wonderful creations!!
Click here to to continue onto Barb’s  Blog….

Hop this way to the next blog
or hop back to see what Linda has to share!!
Or this way to the prior blog

If there is anything you would like to order please click on the pictures below …it will take you right to my store.  And as always…thank you for your orders!!
Until next time…..
ReneeKohnkeSignature

Thursday, October 18, 2018

Halloween Gift!

Hello Stampers!!
Here is a great gift idea for any gal at Halloween! At my Holiday Stamp Camp ….everyone received these for a “pillow gift!”   Throughout Stamp Camp …all attendees receive goodies and gift throughout the session!!  Fun stuff!!
IMG_E1967
First taking a Pizza Box….brayer it using Gorgeous Grape Ink.  Add the striped Designer Paper from Toil and Trouble.   It is tied up with our awesome Black Glitter  Ribbon.
IMG_E1969
On the inside is a surprise gift using our Spider Trinkets made into earrings!!!  Too cute!!
IMG_E1970
On the inside cover …cut from the Toil and Trouble DSP a cute, little witches hat!!!   And I LOVE the sentiment from Stitched All Around.   Perfect!!
IMG_E1972
Here is a close up of the earrings…super easy ….super spooky!! 
IMG_E1973
Now that is a cute little treat for any gal…young or old alike!!

If there is anything you would like ….just click the picture below and it will take you to my store.   And as always…thank you for your orders!!


until next time….
ReneeKohnkeSignature

Tuesday, October 16, 2018

Greek Isles Trip Achievers Blog Hop

Image may contain: sky, outdoor and textWelcome to our first ever Greek Isles Trip Achievers Blog Hop!   This blog hop is for those who have earned the Stampin’ Up! Greek Isles incentive Trp.  We are going to cruise throughout Greece in July.  I can hardly wait!! 
But for now we have my favorite time of year…..I love September through December!!  So many special times to get together with friends and family!!   Coming first is Halloween!!  I just love passing out candy to all  the little Trick or Treaters coming down the way in their fun costumes!   Maybe that is why I fell in love with the Trick or Tweet Stamp Set!  It is so darn cute!
IMG_1842
Starting with a Basic Black card, add Lemon Lime Twist for the next complimenting layer.  And the cute dotted Lemon Lime Twist DSP comes from the Toil and Trouble Designer Paper.  Add a strip of the ever popular Black Glitter Ribbon (the picture doesn't do it justice!) All are colored in with our fabulous Stampin’ Blends!        Love this Trick or Tweet Ghosty Bird!!
IMG_1843
And this adorable mummy cat…so cute!
IMG_1847
….inside the card….
IMG_1844
Add a bat from the Spooky Bats Punch
IMG_1848
And finally the part animal puppy!!!
IMG_1845
Just “batty” for them!!   There still is time to make these cards for Halloween!!   Just click on the pictures below and it will take you right to my store!
But now….check out all the other awesome creations from other top demonstrators!!   You are with Renee Kohnke/Water City Stampers now. 
Happy Hopping!!


until next time…..
ReneeKohnkeSignature